Switching internet providers can feel like a chore. Between contracts, equipment returns, and installation appointments, many people stick with a service that no longer works for them just to avoid the stress. The good news is, with the right approach and some preparation, changing providers can be smooth and stress-free. This guide walks you through step by step so you can switch internet providers without the hassle while ensuring you stay connected throughout the process.
Why Switch Internet Providers?
There’s no reason to stay stuck with an internet plan or provider that’s not meeting your needs. Some common reasons for switching include:
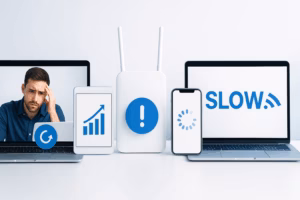
- Slow speeds during peak hours
- Unreliable connections that often drop out
- High monthly costs with no real upgrades in performance
- Better fiber or high-speed options available in your area
- Poor customer service experiences
Signs It’s Time to Change
Ask yourself these quick questions:
- Do I consistently struggle with buffering or lag when streaming or gaming?
- Am I paying for speeds I rarely experience?
- Have competitors in my neighborhood started offering better deals and plans?
If you answered “yes” to two or more questions, it might be time to make a switch.
Step 1: Review Your Current Contract
The first step in switching internet providers is understanding what obligations you currently have with your existing service. Many providers use promotional discounts that lock you into a 12–24 month contract. Here’s what to check:
- Contract length: How many months are left before it expires?
- Early termination fees: Sometimes hefty, but worth comparing with potential savings.
- Equipment obligations: Do you own your router/modem or are they leased?
- Promotions ending: Bills often jump once promotions expire, a perfect time to look elsewhere.
Step 2: Research Alternatives Available in Your Area
The next move is figuring out which options exist in your neighborhood. Options vary depending on location, but you’ll generally see choices such as fiber, DSL, satellite, fixed wireless, or local cable providers.
How to Research Effectively
- Check your city’s subreddit on Reddit to see what neighbors are saying about the best providers locally.
- Use Wikipedia’s list of internet service providers to understand different technologies.
- Look at recent reviews on Yelp for local ISPs to get real consumer perspectives.
- Ask in community groups on Facebook about reliability in your area.
Remember, a high speed on paper means little if the service consistently drops or is oversubscribed in your neighborhood.
Step 3: Compare Plans Beyond Just Price
It’s tempting to only compare the monthly bill, but real value comes from looking deeper:
| Factor | Why It Matters |
|---|---|
| Speed (Download/Upload) | Critical for video calls, streaming, and gaming |
| Reliability | Consistent uptime is more important than raw advertised speeds |
| Data Caps | Unlimited plans save heavy users from bill surprises |
| Installation Fees | Some waive these; others charge $100+ |
| Customer Service | Helpful when you need troubleshooting |
Step 4: Time Your Switch Smartly
You don’t want to cut your old service before your new one is up and running. Plan ahead to avoid downtime:
- Schedule installation with your new provider before canceling the old one.
- If working from home, consider overlapping services for a week to guarantee no internet blackouts.
- Choose a slow period (not during deadlines or kids’ exams) for installation day.
Step 5: Set Up and Test Your New Connection
Once your new provider installs service, give it a thorough test. Here’s what to do:
- Speed test: Run a test on a site like Reddit’s Speedtest community to confirm speeds match what you’re paying for.
- Coverage test: Walk around your house with a WiFi-enabled device to ensure coverage reaches everywhere.
- Device check: Connect smart TVs, laptops, phones, tablets, and smart home devices to confirm compatibility.
Step 6: Cancel Your Old Service Properly
Don’t just unplug your modem and call it done. Properly canceling avoids surprise charges:
- Return rented equipment like modems and routers on time (get a receipt or proof of return).
- Settle your final bill completely to avoid collection notices.
- Request a confirmation email or letter that your account is officially closed.
Extra Tips for a Hassle-Free Switch
- Negotiate: Some providers will offer discounts if you mention you’re considering leaving.
- Bring your own equipment: Buying your own modem/router saves money in the long run.
- Check for sign-up bonuses: Some ISPs offer gift cards, free installation, or no-contract promos to new customers.
- Don’t forget the bundle trap: If you only want internet, don’t let sales reps upsell you with adds you won’t use.
A Hassle-Free Internet Switching Checklist
Here’s a quick checklist you can use to simplify your switch:
- ✔ Review your current contract details
- ✔ Research and compare providers in your area
- ✔ Choose a plan that meets speed, reliability, and budget needs
- ✔ Schedule installation for your new connection first
- ✔ Test new service thoroughly
- ✔ Cancel old service and return all equipment
Final Thoughts
Switching internet providers doesn’t have to be overwhelming. With a step-by-step plan, some patience, and the right resources, you can transition smoothly, avoid downtime, and finally enjoy an internet connection that works for your lifestyle. Remember — your household deserves reliable, fast, and affordable internet that fits modern needs. Don’t settle for less when switching can be this simple.
“Most inquiries are answered within the same day”

Written by Sam jaffer
Content writer and tech enthusiast sharing insights on internet connectivity.